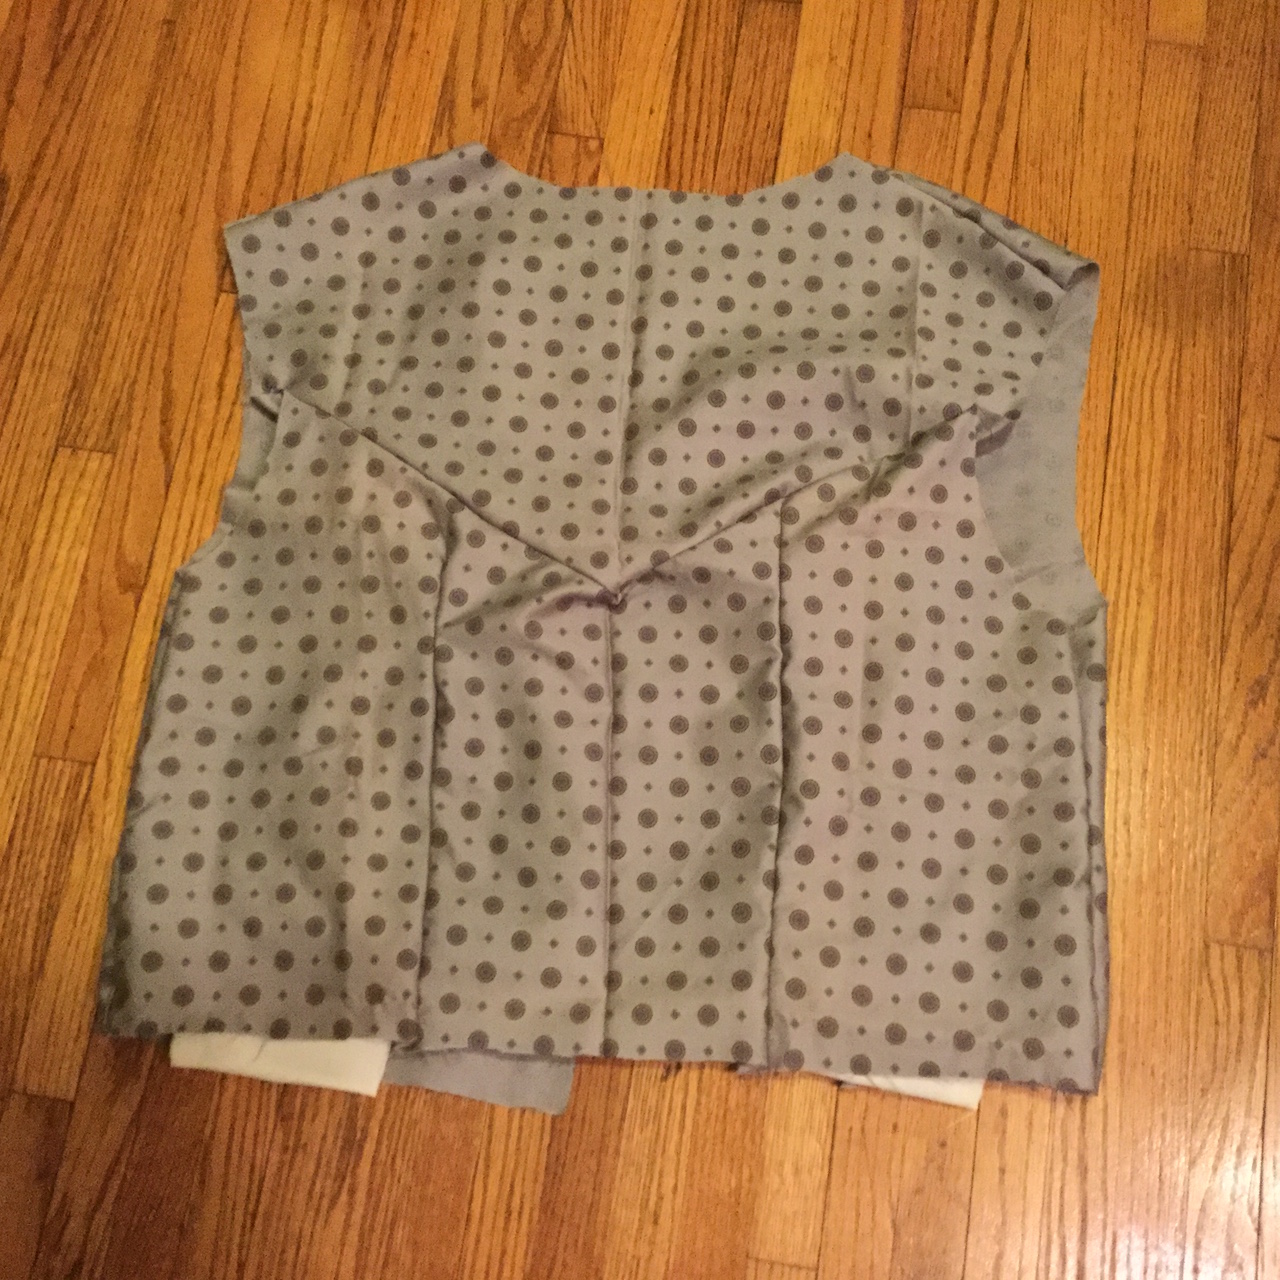
So I started on the vest for Jeff’s original character in the Girl Genius universe: a Mechanicsburg reporter. Spoiler: the pattern for this vest is the same as Sherlock’s, minus the flipped over collar. I’d kept out a couple of pattern pieces with the precut fabric (apparently to check on the darts? except they were already chalked) but not the directions, so I worked mostly from memory with a quick glance at Sherlock for reference on the pockets. It went pretty well! I think the top of the pocket liners weren’t attached quite right, but no one will be able to tell, and the outside looks very nice.
Much to his chagrin, I did have to put the vest on Jeff inside out to find out what else had to be done to snug up the fit. Luckily, I put it on inside out to begin with, so the pins were on the correct side. It ended up coming to an interesting point in the center back which almost makes it look like it’s made from a total of five pieces of fabric instead of three.
I finished up more little things, which means today has lots of pictures!
First I got out the Sherlock/Jaime shirt and whipped up some cuffs. They’re certainly not perfect, but they give the right appearance. The cuff links go right through the cuff to the shirt itself and back. They’ll need to be safety pinned on the opposite side to keep them from pivoting like they did in the picture, though. Of course, Tink wanted to help…
Then it was time to make up Sherlock’s prop bag. As with Irene’s, I took the two-sided fabric that wrapped the kimono (choosing the plaid side this time), sewed up the bottom and sides, added horizontal stitching for the bottom of each pocket, and cut open the pockets. There are spots for pipe, watch, belt, magnifying glass, hat, and scarf.
I quickly did a pair for the Doctors from the fabric cut off the bottom of the kimono, with much less detail this time. Just three big pockets for the iconic Converse tennies, K-9, and everything else (sonics and ties for both, of course, plus brainy specs and psychic paper for him and a khaki headband for me). The K-9s still take a lot of space.
One last set for the fantasy renaissance outfits, and this project is done for now. These were the kimono sleeves, so they’ve got side openings instead of front. Both hold shoes on the bottom, with hose on top for him, and outers sleeves on top for me. All of the prop bags got stitched directly to the hangers as well – so that’s a dedicated 3-4″.
In all its glory, a split front gown with (store bought) underdress and elaborate sleeves.
So I finally finished my historical mash up gown, and if I’m going to be honest with myself it no longer qualifies as such. It’s just a fun fantasy piece – and there’s nothing wrong with that!
The long break was ideal for determining what trims and how much to use (the answer, as may be obvious from the image to the left, is “not much”). Sad as it was to skip the fichu, less is more.
I ultimately decided to reuse the beads from my 1920s necklace as a decorative touch along the neckline, plus a bracelet (and supporting hook and eye) for the center front closure. I hand-embroidered the sleeve hems with a complementary dark blue chain stitch (and a lighter blue on the back side of one sleeve, and a couple of french knots, when I ran out of thread. Twice). I got out the 18″ (I assume) embroidery hoop for that task, and it was encouraging to see how I was able to pick up the pace once I got the orientation right. Although as a lefty, I ended up working from left to right instead of vice versa! I was able to make the stitch do double duty, too, actually creating the sleeve hem, too.
I went back to the machine to add ribbon along the neckline and front hem of the underdress, though. It came out a bit sloppy, but after a couple of hours (admittedly, I’d put a movie on) with the chain stitch, I was ready to rush. The hem of the overdress was a bit of an adventure, too – I got out a grey thread that I thought coordinated well, but it turned out to be much too thick for the machine. I was lucky to get the thread out of both fabric and machine without too much trouble! I ended up folding right sides of lining and final fabric together (leap frogging the body of the dress) and stitching about 2/3rds of it by machine, before turning it right side out and hand finishing. All in all, a job well done!
While I’ve still got to get the hardware to finish the corset (not to mention figure out where I want to place said hardware so I know how much to buy), I thought I’d put the finishing touches on the rest of Irene and make up hanging prop bags. Now it can all hang together without making a giant lump!
As you can tell, there’s one hanger for outer wear (with pockets for gloves, hat, and cummerbund) – note the new trim hand stitched at the hem, also! Trim is a big step for me, not to mention taking the time for hand sewing. And then one hanger for inner wear, with a pocket for the corset to go in once it’s finished.
After spending quite a lot of time on Irene, I wanted to switch gears – and I also wanted to be sure I could clear out the excess kimono bits. So I went back and tried to finish the button-down dress transformation. That’s…not exactly how it turned out.
I started by stitching all the pinned seams on the outer kimono fabric (having shifted the pins to the inside, with rights sides together, instead of on the outside, with wrong sides together). Next, the liner pieces attached nicely – side seams and shoulder seams straight stitched together. Then came time to meld liner and outer layer at the armholes. Each one was oriented correctly…but having done both at once, I couldn’t flip the liner back to the inside! So I cut down the liner’s center back, flipped each half through its armhole, and contorted the resulting combination to put a new hidden center back seam in the liner.
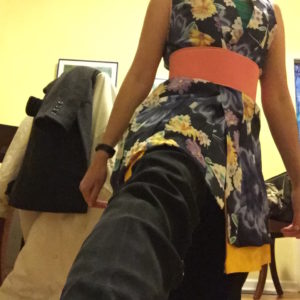
When I’m not sticking a leg out to take a selfie with my toe, the yellow obi reaches center front on both sides of the hem…
And then I discovered it was too tight to button properly. I started playing with it as a vest, though, wearing a contrasting undershirt and fastening the belt meant to go under the obi as a sash. I pinned the obi at the hem and struggled to photograph the result. The photo is weird, but the obi placement worked, so I’ve since stitched it in place. I also added a hook and eye near the bottom to try to keep the border continuous. It’s very comfy!
I actually decided to get a jump start on the corset right after I finished the drawers, which turned out to be a very good decision since I only completed two additional steps of the process yesterday. First, I skimmed the instructions since I hadn’t yet acquired the appropriate hardware and wasn’t sure whether or how I wanted to adapt their placement for decades’ distant silhouettes. I still haven’t and don’t, for that matter, but I figured I could at least assemble the soft goods.
So I put in stitching lines as instructed for the bust gussets, remembered I’d cut the (larger) size appropriate for my hip measurement, and opted not to add any circumference up top for the time being. I skipped on down to the stitching lines for the hip gussets, and again not being sure I’d need the whole addition, went on to putting in the side seams. By this point I knew I’d chosen material that was much easier to work with than the last two pieces!
Still bereft of specialty hardware, I skipped most of the boning and carefully determined the anticipated overlap of the front sections. That let me baste them together and make it easy to play with the fit of the whole garment. I then moved directly to the rear closure – folding over the back edge, leaving pockets to insert boning, and inserting grommet after grommet after grommet. As I started lacing it up, a couple of grommets fell out – and when I put it on and tightened it up with Jeff’s help, a couple more pulled loose from the cord’s friction and dangled from the web like an out-of-place bead.
In any case, we learned I’d been right about the bust gussets, but that I would need the hip gussets. I put in one set that night – one of which was wrong-side-out – and the other set yesterday. The second fitting and final boning plan are, of course, yet to be arranged.
Even compared to the chemise, which was no walk in the park, making Irene’s drawers yesterday (again from Simplicity 2890) was just awful.
I started improvising right away. Using a thinner lace than recommended was, I think, the right choice; it matched the fabric much better. Honestly I’m not sure how they intended the hem to work, but I think folding it over itself to hide the ragged edge worked nicely. Though I did end up using a zigzag stitch for the first time in ages to get it to adhere properly and still missed a spot. Actually, the zigzag stitch was a lot more compatible with the fabric as far as preventing inadvertent gathers, but I didn’t think it would be appropriate to use throughout the construction process.
I ended up making three tucks at the bottom of each pant leg instead of five because (surprise) I didn’t mark my folding lines and I thought I’d reached the point in the curve where one should stop making tucks anyway. I think I could have done more, but they didn’t come out very well so I don’t mind not having continued.
Putting the inside seam into each leg went fairly smoothly, but I seem to have made two right legs, because when you line them up the seam goes to the front for one and the back for the other. Of course this may trace back as far as choosing which side to put the lace on… Ah, well, no one will see. Of course it was at this point as well that I realized the instructions called for hemming the crotch seam before putting in the inside seams.
And then I charged on ahead with stitching the two legs together before it became clear that there was only supposed to be a very short seam…leaving the rather practical opening that I’d previously read was extant during the Regency but hadn’t realized carried through to the 1860s. So at least this piece will carry over to that other costume.
I barely remembered to gather the waistline, but at least I thought the waistband went together pretty nicely. Its facing did, too. Then I tried attaching the waistband to the facing. They immediately failed to line up. As I started putting the waistband onto the waistline, I oriented it wrong; ripped stitches (only a few!); started over. I stitched from the center front, which worked nicely on the “right” side, but then when I got to the wrong side, the fabric just would not cooperate! Now granted, I wasn’t pinning, I probably went too fast, and all that jazz, but I’d be willing to be that it was the flimsiness of the fabric that was my downfall.
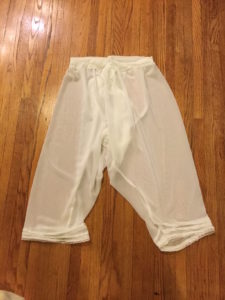
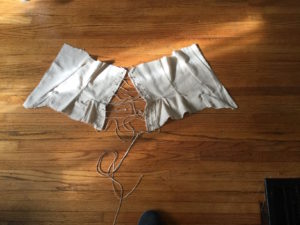
Irene’s very sheer drawers! Probably worth rebuilding in a lightweight cotton or linen someday…
Of course the two sides of the waistband didn’t line up either (it’s supposed to come to a point at the center front, not that you can tell). Overall, the waistband certainly achieves the requirement of being functional, but it isn’t lay prettily flat while it does it. It didn’t feel worth it to put the extra seams along the finished waistband, and I used a hook and eye instead of a button to close it at the back. I’d call the darn thing done!
 Much to his chagrin, I did have to put the vest on Jeff inside out to find out what else had to be done to snug up the fit. Luckily, I put it on inside out to begin with, so the pins were on the correct side. It ended up coming to an interesting point in the center back which almost makes it look like it’s made from a total of five pieces of fabric instead of three.
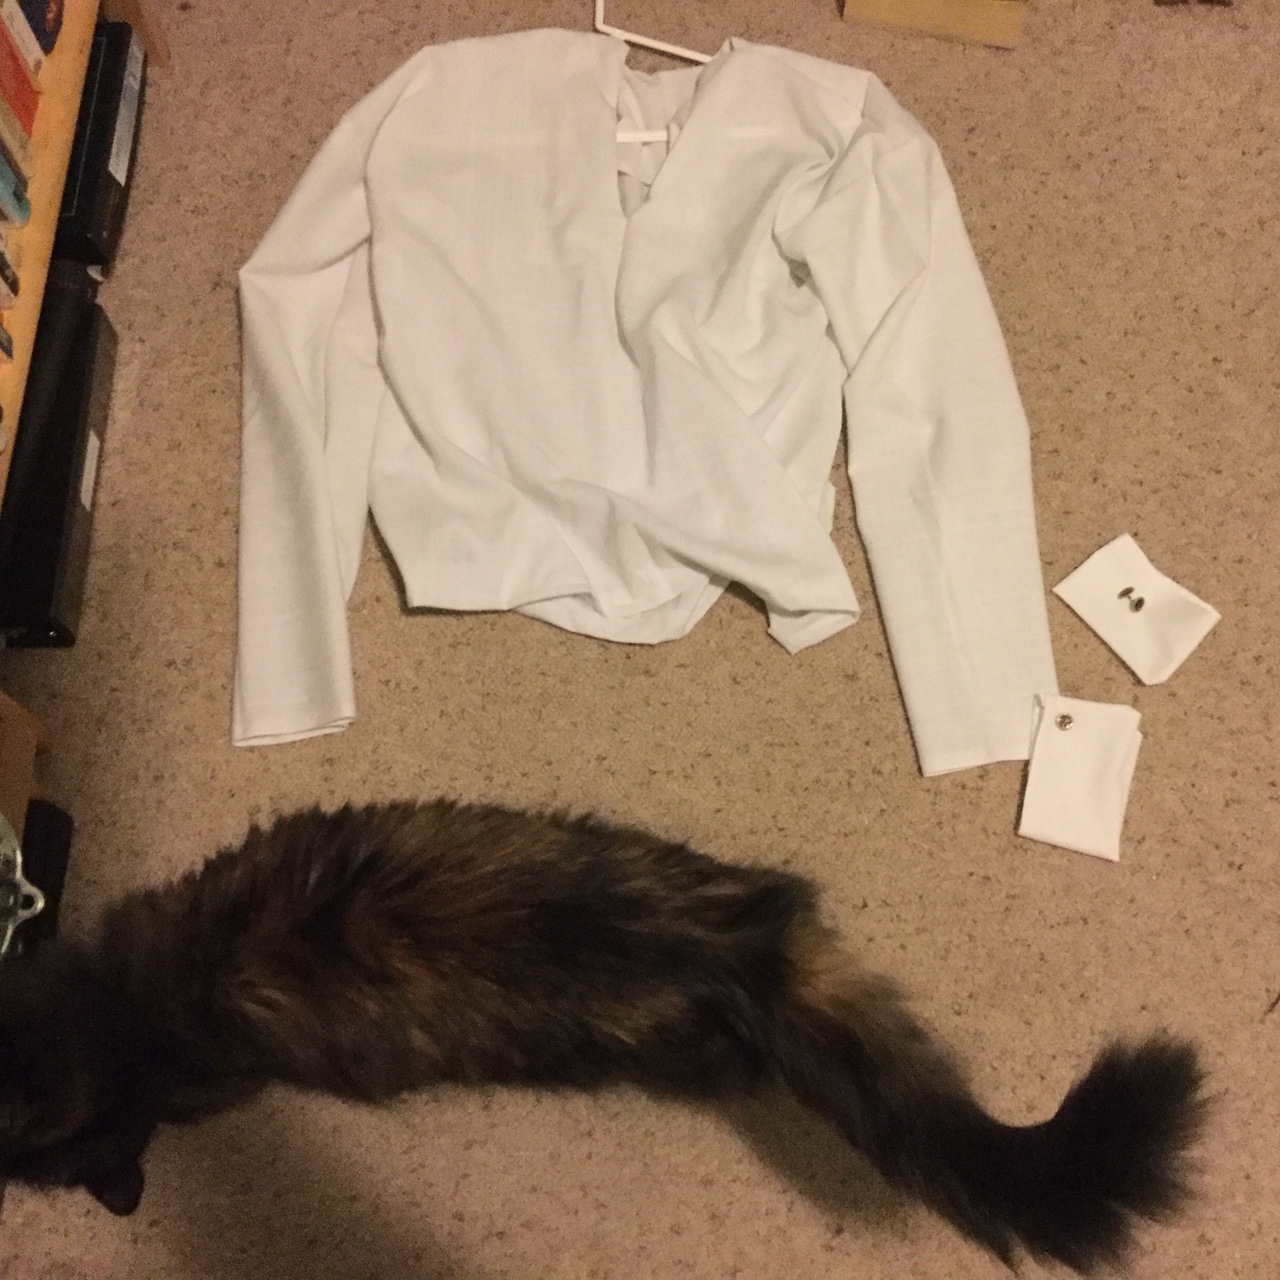


 In any case, we learned I’d been right about the bust gussets, but that I would need the hip gussets. I put in one set that night – one of which was wrong-side-out – and the other set yesterday. The second fitting and final boning plan are, of course, yet to be arranged.