While I’ve still got to get the hardware to finish the corset (not to mention figure out where I want to place said hardware so I know how much to buy), I thought I’d put the finishing touches on the rest of Irene and make up hanging prop bags. Now it can all hang together without making a giant lump!
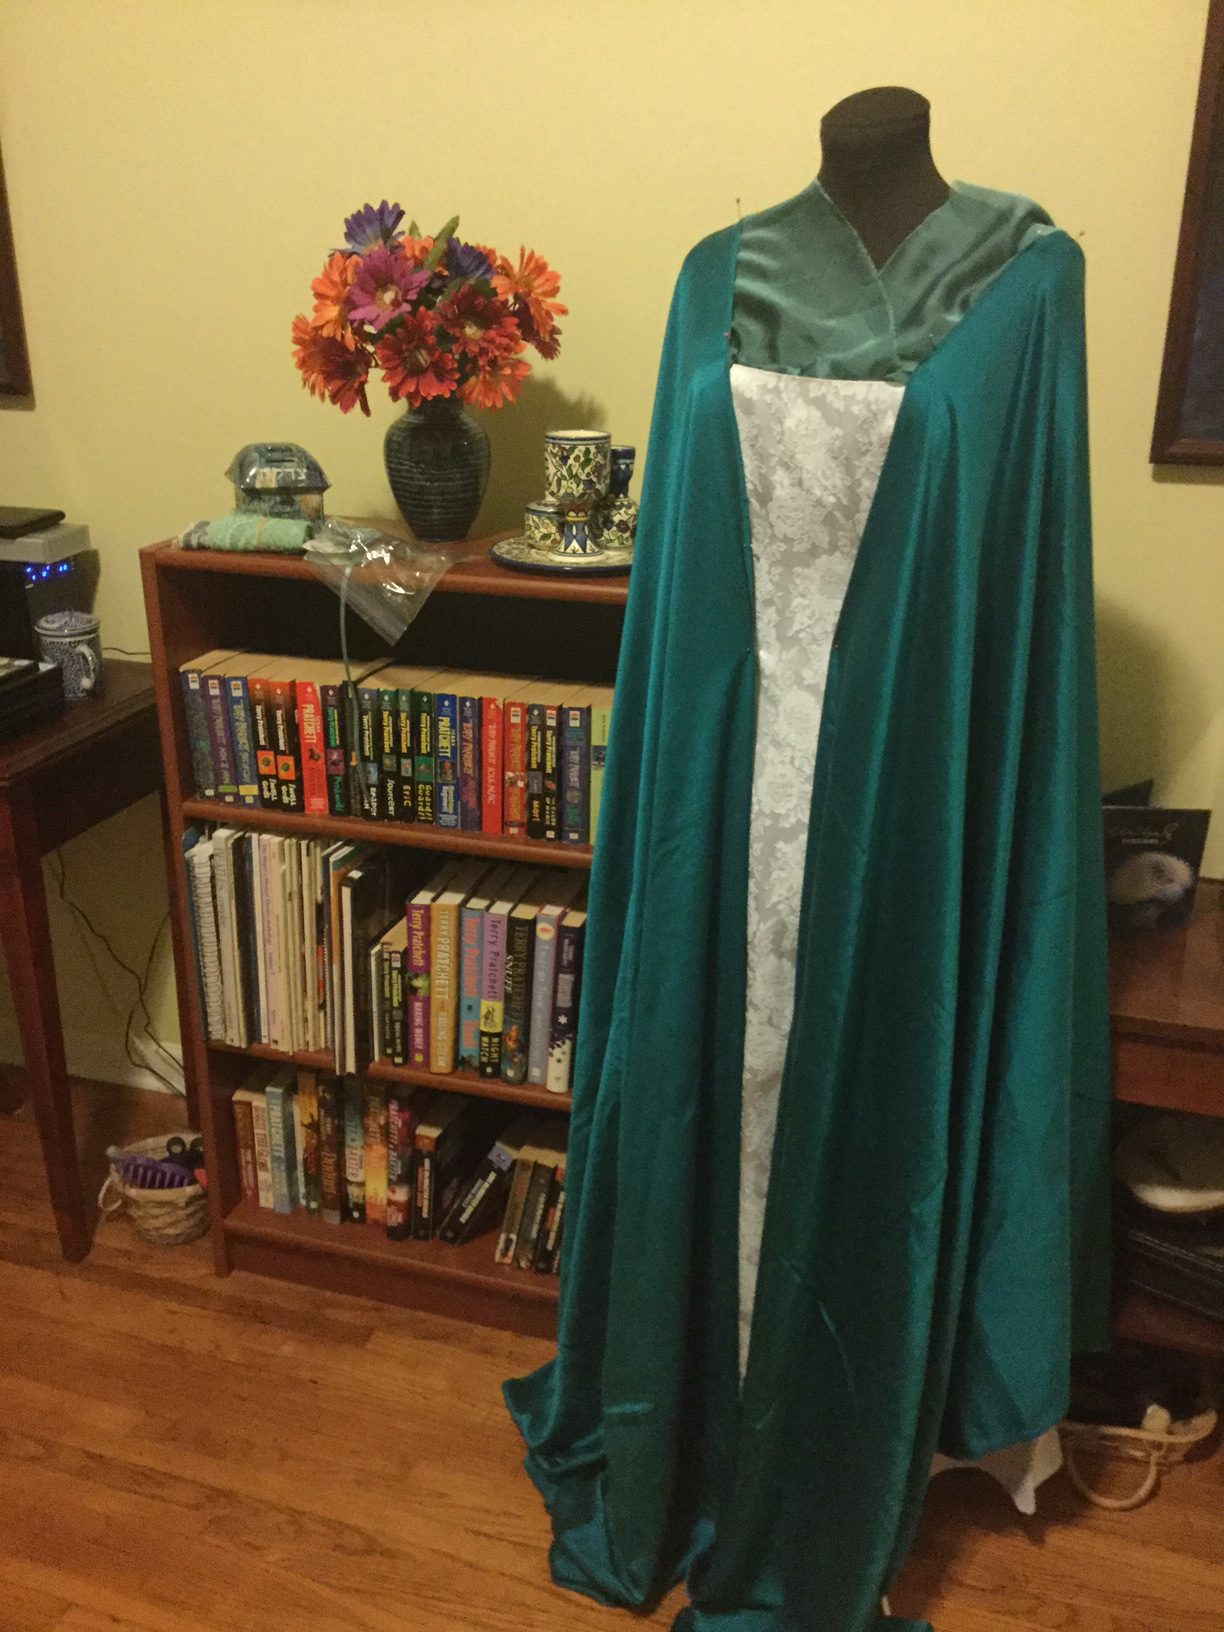
As you can tell, there’s one hanger for outer wear (with pockets for gloves, hat, and cummerbund) – note the new trim hand stitched at the hem, also! Trim is a big step for me, not to mention taking the time for hand sewing. And then one hanger for inner wear, with a pocket for the corset to go in once it’s finished.
After spending quite a lot of time on Irene, I wanted to switch gears – and I also wanted to be sure I could clear out the excess kimono bits. So I went back and tried to finish the button-down dress transformation. That’s…not exactly how it turned out.
I started by stitching all the pinned seams on the outer kimono fabric (having shifted the pins to the inside, with rights sides together, instead of on the outside, with wrong sides together). Next, the liner pieces attached nicely – side seams and shoulder seams straight stitched together. Then came time to meld liner and outer layer at the armholes. Each one was oriented correctly…but having done both at once, I couldn’t flip the liner back to the inside! So I cut down the liner’s center back, flipped each half through its armhole, and contorted the resulting combination to put a new hidden center back seam in the liner.
When I’m not sticking a leg out to take a selfie with my toe, the yellow obi reaches center front on both sides of the hem…
And then I discovered it was too tight to button properly. I started playing with it as a vest, though, wearing a contrasting undershirt and fastening the belt meant to go under the obi as a sash. I pinned the obi at the hem and struggled to photograph the result. The photo is weird, but the obi placement worked, so I’ve since stitched it in place. I also added a hook and eye near the bottom to try to keep the border continuous. It’s very comfy!
I actually decided to get a jump start on the corset right after I finished the drawers, which turned out to be a very good decision since I only completed two additional steps of the process yesterday. First, I skimmed the instructions since I hadn’t yet acquired the appropriate hardware and wasn’t sure whether or how I wanted to adapt their placement for decades’ distant silhouettes. I still haven’t and don’t, for that matter, but I figured I could at least assemble the soft goods.
So I put in stitching lines as instructed for the bust gussets, remembered I’d cut the (larger) size appropriate for my hip measurement, and opted not to add any circumference up top for the time being. I skipped on down to the stitching lines for the hip gussets, and again not being sure I’d need the whole addition, went on to putting in the side seams. By this point I knew I’d chosen material that was much easier to work with than the last two pieces!
Still bereft of specialty hardware, I skipped most of the boning and carefully determined the anticipated overlap of the front sections. That let me baste them together and make it easy to play with the fit of the whole garment. I then moved directly to the rear closure – folding over the back edge, leaving pockets to insert boning, and inserting grommet after grommet after grommet. As I started lacing it up, a couple of grommets fell out – and when I put it on and tightened it up with Jeff’s help, a couple more pulled loose from the cord’s friction and dangled from the web like an out-of-place bead.
In any case, we learned I’d been right about the bust gussets, but that I would need the hip gussets. I put in one set that night – one of which was wrong-side-out – and the other set yesterday. The second fitting and final boning plan are, of course, yet to be arranged.
Even compared to the chemise, which was no walk in the park, making Irene’s drawers yesterday (again from Simplicity 2890) was just awful.
I started improvising right away. Using a thinner lace than recommended was, I think, the right choice; it matched the fabric much better. Honestly I’m not sure how they intended the hem to work, but I think folding it over itself to hide the ragged edge worked nicely. Though I did end up using a zigzag stitch for the first time in ages to get it to adhere properly and still missed a spot. Actually, the zigzag stitch was a lot more compatible with the fabric as far as preventing inadvertent gathers, but I didn’t think it would be appropriate to use throughout the construction process.
I ended up making three tucks at the bottom of each pant leg instead of five because (surprise) I didn’t mark my folding lines and I thought I’d reached the point in the curve where one should stop making tucks anyway. I think I could have done more, but they didn’t come out very well so I don’t mind not having continued.
Putting the inside seam into each leg went fairly smoothly, but I seem to have made two right legs, because when you line them up the seam goes to the front for one and the back for the other. Of course this may trace back as far as choosing which side to put the lace on… Ah, well, no one will see. Of course it was at this point as well that I realized the instructions called for hemming the crotch seam before putting in the inside seams.
And then I charged on ahead with stitching the two legs together before it became clear that there was only supposed to be a very short seam…leaving the rather practical opening that I’d previously read was extant during the Regency but hadn’t realized carried through to the 1860s. So at least this piece will carry over to that other costume.
I barely remembered to gather the waistline, but at least I thought the waistband went together pretty nicely. Its facing did, too. Then I tried attaching the waistband to the facing. They immediately failed to line up. As I started putting the waistband onto the waistline, I oriented it wrong; ripped stitches (only a few!); started over. I stitched from the center front, which worked nicely on the “right” side, but then when I got to the wrong side, the fabric just would not cooperate! Now granted, I wasn’t pinning, I probably went too fast, and all that jazz, but I’d be willing to be that it was the flimsiness of the fabric that was my downfall.
Irene’s very sheer drawers! Probably worth rebuilding in a lightweight cotton or linen someday…
Of course the two sides of the waistband didn’t line up either (it’s supposed to come to a point at the center front, not that you can tell). Overall, the waistband certainly achieves the requirement of being functional, but it isn’t lay prettily flat while it does it. It didn’t feel worth it to put the extra seams along the finished waistband, and I used a hook and eye instead of a button to close it at the back. I’d call the darn thing done!
Yesterday I built Irene’s chemise. It was…interesting.
Thanks to not marking the indicated stitching lines, I messed up the first two steps – stitching along the stitching lines at the center front neckline and then cutting a slash between them. My first seam cut the corner too quickly, so I had to pull it and redo. I gathered the top edge as instructed and got ready to attach the yoke. I peered carefully at the illustration to orient the yoke correctly, attached each side…and realized that the illustration started at center front. Off the yoke came, turned around, and on again it went. The parallel steps for the back blessedly went more smoothly, except that Tinkerbell kept trying to curl up on my lap.
Then came the sleeves. I got the sleeve oriented wrong side up, the shoulder line underneath it right side up…and sewed the sleeve to the neckline instead of the armhole side. Lather, rinse, repeat. Around this time I looked farther up the pattern instructions and finally noticed the header “Civil War Undergarments”. Yes, ladies and gents, Simplicity 2890 despite complete lack of indications on the outside, is intended for the 1860s. I decided to mentally reassure myself that I did indeed read a while ago that undergarments didn’t change much in the latter half of that century, and move on.
Next up, armhole facings. For once I got the orientation right on the first try, but I incorporated some shortcuts: stitching the non-seam edges down instead of pressing them. Once it was time to turn them under, I machine stitched them again, when they probably should have been hand finished. One of the four pieces also went in about an inch and a half lower than it was supposed to.
Then I put in flat-fell side seams, which was amusing since I’d read about flat-felled seams just last week. Rather than clipping the short edge, I actually set the seam slightly off to begin with – by accident on the first side, on purpose on the second. After that, it was time to face the yoke, at which point I realized I’d only cut one back yoke piece (as illustrated) instead of two. Since the instructions talked about starting with the shoulder seam, and the drawing indicated the same side facing up for front and back yoke, I decided to cut another. I used the selvage for the lower edge intended to be slipstitched to the garment (though of course I machine stitched again). I also sewed the hem, even though that wasn’t mentioned…
Lily wanted to help show off the finished chemise!
I did decide to use a snap instead of a button, since all of my buttons are quite modern and I’m still terrified of the buttonholer. And that was the final touch on my rather tent-like (aside from the tightly fitted sleeves) late 1800s chemise.
It got worse before it got better. Not that it’s gotten better yet.
When we last left the scene, there was fabric everywhere. Now there’s more fabric. Most of the “white to beige” category had absolutely minuscule amounts of yardage, which when compared to the patterns I meant to use were quite dismal. Needless to say, they would not be sufficient. So I hauled out the motherload of very thin, delicate white fabric that’s going to be terrifyingly sheer as chemise and drawers. But at least there’s more than enough beige for Irene’s corset, Regency short stays, and hopefully even the lining of the Regency day dress.
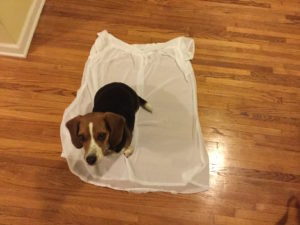
The sewing detritus takes over – or maybe the cat does. And the filing cubby is filling up…
I laid out the white and started cutting the pattern pieces…which is when the cat decided to come “help”. It is possible that I encouraged her, waving strips of scrap in her face, but I take no responsibility for her penchant for lying on crinkly things. Her parking herself on top of the pattern pieces is her own doing.
So far, the chemise is cut, the corset is just about laid out…and the cat has vanished, so I’d better get back to it while I’ve got the chance…
And then, because I am a fickle and impractical creature, I got out a ton of fabric – not to mention all my old works in progress – to start working on more projects instead of finishing those more recently started. But fear not, gentle reader – at least I am putting them in a filing cubby!
The full horror of the office: earth tone cottons and linens sitting on top of the filing cubby for potential medieval outfits (we have friends from out of town potentially going to an SCA event only a couple of hours away this spring); more fabric for Jaime tucked away in the box behind that; the aforementioned yellow fabric for a Regency day dress on the rocker (and perhaps the green for a spencer?); detritus from the yukata on the stool waiting to be turned into hanging accessory-holders; white to beige cottons and linens for Irene’s undergarments; and in the center of the floor, a pair of pinstripe trousers which are interestingly going to be lined with a quasi-harlequin design – one liner leg white and the other black, since that’s what was available. Most of the cutting will have to wait for my next work day, however…
With another wibble, because apparently I can only be chronically late or have an enormous stock of pre-written entries, here is the mystery project I promised to unveil:
My sister had a kimono (technically a yukata, which has smaller sleeves and generally cotton, though this one might be synthetic) she was given by an exchange student. She recently decided to part with it while getting the rest of her things from our mom’s place, and asked me to find it a new home. Well, after she’d dropped it off, I wrapped it around me, Jeff said the colors/print looked nice, and off I went…chopping off the sleeves, a bunch of the length, and pinning new side seams and darts (right-side out instead of wrong-side out unfortunately). As my mother pointed out, that new use probably wasn’t what she’d intended. Thankfully, my fait accompli was not hugely offensive to her – whew!
Cut down yukata, dark pink waistband, light pink porto-liner, and yellow obi-turned-trim.
I dug through my stash to find a coordinating color (which turned out to be light pink) to line it with; I cut it the same way I did the skirt of the holiday dress – laying out a completed garment and using it as a “pattern”. I plan to use the wrap from securing the obi as a belt and the obi itself as a decorative trim at the hem. I’ll probably have to suck up my button-hole fear and actually put some in (and find buttons, of course), since it’s intended to be a button-down dress. Or I could punt and use hooks and eyes…
I’m using a time wibble again because I didn’t quite feel up to posting on the 12th; I’d made no progress to speak of on the mash up, wasn’t ready to share my embroidery progress on Cersei, and hadn’t cleared my next project (yes, I have three major WIPs now) with my sister. But I spent some time browsing sewing blogs last night, and aside from becoming more discouraged about the a-historical nature of the mash up, I think it would be worthwhile to lay out my sewing goals for the year (skipping links this post – if you’re new, browse the costume tag!):
Obviously, I need to finish up several of my current projects:
Finish historical mash up gown
Finish Cersei
Finish Jaime
Finish new repurposing project – more info on this soon!
And maybe finish one more item from my box of old WIPs?
Deadlines are really useful for me, and I just found out my local museum is hosting historical teas this spring, so I’d like to add:
Foundation garments for Irene
And maybe a new leg o’ mutton sleeve blouse?
And then Jeff and I are planning to at least hang out outside of Comic Con this year singing nerdy music, so we want some more costumes for that. We’ll take Cersei and Jaime one day, and we could easily use Sherlock and Irene again, so then I’ll only need to choose 1 or 2 of the following pairs:
Rincewind or Vimes and Susan (from Terry Pratchett’s Discworld series)
Mechanicsburg reporter and false female Jäger (inspired by webcomic Girl Genius)
Or (and this is my newest idea, and thus a late addition to the list) Giselle and Robert (from Enchanted, because my mom has a very appropriate set of floral curtains she’d like to replace)
Plus one stretch goal, I think, using a nice pale yellow from my stash:
The draped dress form prior to cutting of any kind. I really wanted to include a fichu, so I was excited to find a little bit of complementary sheer fabric in my stash to tuck into the neckline!
Having realized I would need to make a mock up for my historical mashup gown, I got out the biggest piece of white cloth I had. I draped it over the top of the other colors I’d chosen, and – still with trepidation – started cutting. I cut out the left front, lay the yardage down on the floor and cut a mirrored right front. Then I hung the rest from the shoulders and cut the left back edge; again I lay the yardage down (this time with a fold to eliminate a center back seam) to cut the right back edge. I took the largest piece of scrap, draped it over my arm, trimmed it, and used it as a template to cut three more half-sleeves.
I basted the fronts to the back, as well as each sleeve. If I’d had any sense, I’d have at least noticed the uneven, unfinished side seam hems before cutting the final fabric. As it is, I’ll probably have to do something with flounces or lace to hide how the final hem hikes up at the side seam. Though keeping the hem very narrow at that spot might help.
But that’s not all. Having cut the final fabric, I proceeded with assembly of the mockup, expecting to turn it into a liner, and found that the armholes of sleeve and bodice did not line up. The bodice was bigger. So the mockup started out with a couple of pleats at the back of each armhole, creating rather a lot of drape. I tried tacking it in place, but when it didn’t hold, I decided to implement my first attempt at a fix: taking a little length off the narrow end of the sleeve, bringing the seam to a wider part of the curve. It helped significantly. I realized that I also didn’t take seam width into account on the front of the bodice, so I was afraid I’d have to overstitch the two layers, possibly with a framing ribbon in front, to compensate.
Then disaster struck. I had only rotated the pattern piece for the final fabric of the front around, not over. I had two right front pieces, instead of a left and a right. After some panic and swearing, it occurred to me that the piece wasn’t too far off of being symmetrical, so decided to adjust one of them to fit. I trimmed the side that would become the front opening and added a gusset to fill out the armhole. Not nearly as awkward as I’d been afraid of!
I added some more tucks and darts to the mock up, then assembled the final version and did the same to it. Then I took a break to make the puffed inner sleeve. I started with the same sleeve piece as all the rest, cut some rectangles for cuffs, and started putting basting at the lower extremity of the sleeve to find out how much gather would fit. I got my cuff steps out of order briefly, so one edge of a cuff has overstitching when it should have been turned wrong side out and had the edge stitched that way before going back to right side out to stitch to the gather.
Then I had to decide what order the sleeves would sit in. I wasn’t sure whether to use the mock up to line the final sleeve, or to puff out the inner sleeve. The latter won – the white would have looked weird inside the blue sleeve, and the stuffing helped a lot! I was also able to take advantage of that decision to attach the inner sleeves with a half circle of stitching on only the top half of the mockup’s shoulder seam.
Another mental wrestling match with spatial relationships later, I put the final version on the dress form first, right side out, followed by the mockup, outside out (which technically is the wrong side, because I want all the seams and tucks hidden between the layers). I pinned (for once!) all around the front opening, then stitched the layers together. Flip the final layer from the underside to the overside, stuff the inner sleeve into the outer sleeve, and it’s ready for hemming and embellishments. Which will have to wait for another day.
 As you can tell, there’s one hanger for outer wear (with pockets for gloves, hat, and cummerbund) – note the new trim hand stitched at the hem, also! Trim is a big step for me, not to mention taking the time for hand sewing. And then one hanger for inner wear, with a pocket for the corset to go in once it’s finished.
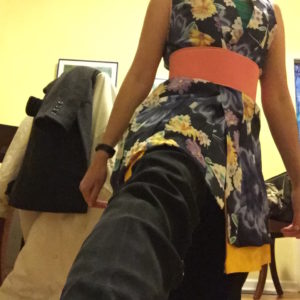
 In any case, we learned I’d been right about the bust gussets, but that I would need the hip gussets. I put in one set that night – one of which was wrong-side-out – and the other set yesterday. The second fitting and final boning plan are, of course, yet to be arranged.
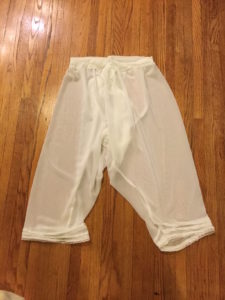

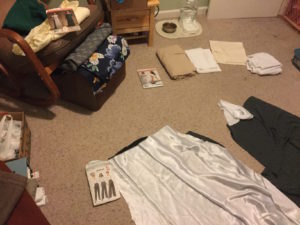 The full horror of the office: earth tone cottons and linens sitting on top of the filing cubby for potential medieval outfits (we have friends from out of town potentially going to an SCA event only a couple of hours away this spring); more fabric for Jaime tucked away in the box behind that; the aforementioned yellow fabric for a Regency day dress on the rocker (and perhaps the green for a spencer?); detritus from the yukata on the stool waiting to be turned into hanging accessory-holders; white to beige cottons and linens for Irene’s undergarments; and in the center of the floor, a pair of pinstripe trousers which are interestingly going to be lined with a quasi-harlequin design – one liner leg white and the other black, since that’s what was available. Most of the cutting will have to wait for my next work day, however…