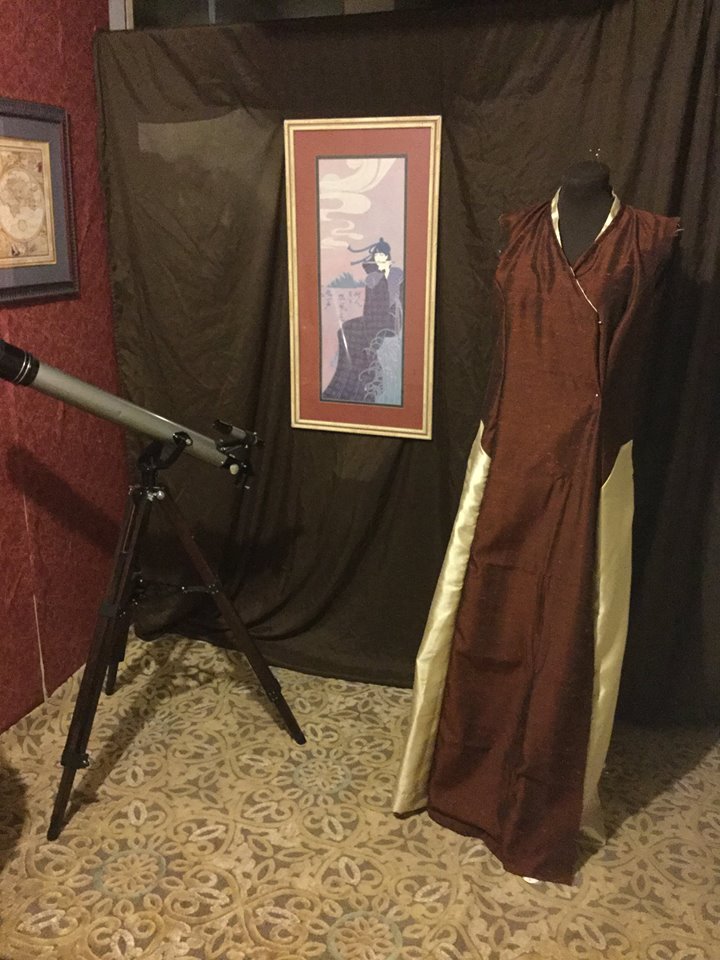
I decided to line the Mechanicsburg vest in the same fabric as the shirt. Cue more rolling…not really. The fraying bits are all tucked into the middle of the fabric sandwich. Getting there was a process though. I used the vest itself as a pattern again and may have neglected that little thing called seam allowances. I was also using the pillowcase from the sheet set, and didn’t want to add more fabric. Well, once I got my armholes set in (one at a time, unlike when I was working on the kimono/vest), the front right and left were decidedly short on coverage! So I got some more strips from the top hem of the top sheet, and tacked them on, and got my top, bottom, and side seams set.
For decoration/fastening, we decided on some cute little blue buttons to go on both left and right, which we’d ultimately like to connect with some brass chain. So there’s a bit yet to go on this piece, but it’s pretty close to done.
Unlike replicating the trousers, making another renaissance shirt (once again taking some of the bagginess out) was an experience with a smooth flow from step to step with a very hard to work with fabric. It was slippery and it wanted to shred. Constantly. I rolled every seam under and stitched them down to keep tiny magenta bits from floating around everywhere. Needless to say, there were still many tiny magenta bits floating just about everywhere.
Look at that shimmer!
Oh! I did have to go shopping for this fabric, to complement the vest-in-progress. We ended up selecting a set of sheets at Goodwill. So the collar and cuffs are from the top hem, meaning I had less fiddly sewing, holding and pinning to do to get them in place. Though I did somehow forget how I wanted to handle that part of the process, meaning the collar might sit a bit oddly. I still need to add a hook and eye at the collar, and buttons at the cuffs. NOT FUNCTIONAL BUTTONS. Not with this fabric’s propensity to shred. But I do have some pseudo-Roman coin buttons that will be perfect.
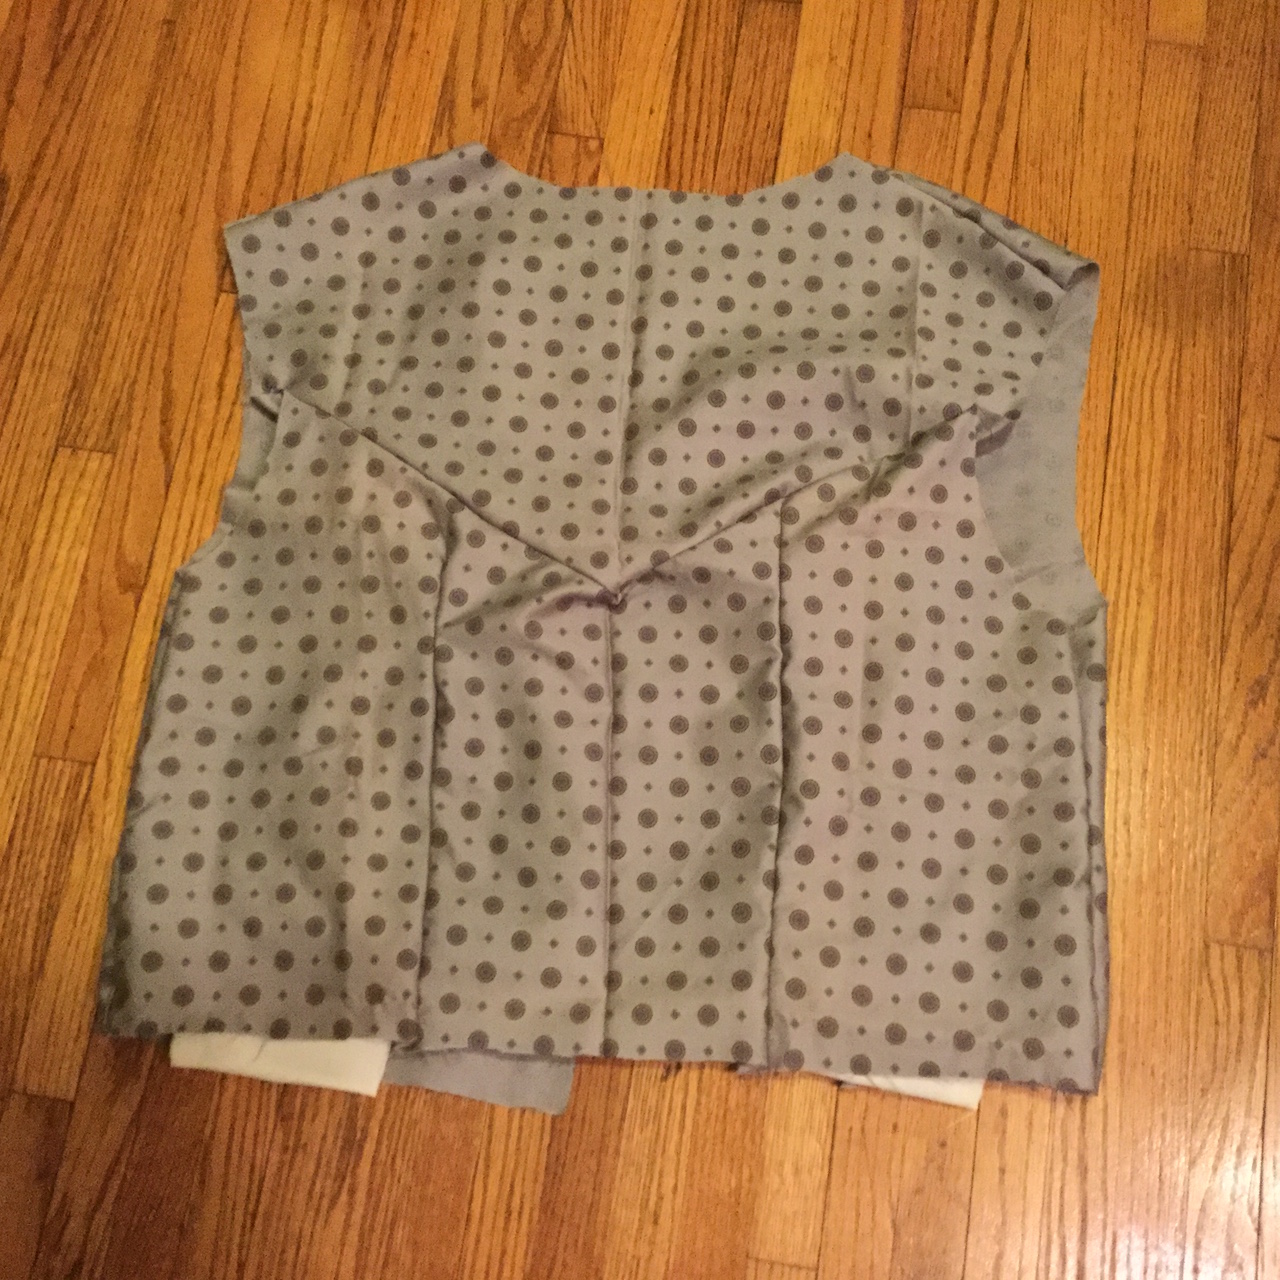
So I started on the vest for Jeff’s original character in the Girl Genius universe: a Mechanicsburg reporter. Spoiler: the pattern for this vest is the same as Sherlock’s, minus the flipped over collar. I’d kept out a couple of pattern pieces with the precut fabric (apparently to check on the darts? except they were already chalked) but not the directions, so I worked mostly from memory with a quick glance at Sherlock for reference on the pockets. It went pretty well! I think the top of the pocket liners weren’t attached quite right, but no one will be able to tell, and the outside looks very nice.
Much to his chagrin, I did have to put the vest on Jeff inside out to find out what else had to be done to snug up the fit. Luckily, I put it on inside out to begin with, so the pins were on the correct side. It ended up coming to an interesting point in the center back which almost makes it look like it’s made from a total of five pieces of fabric instead of three.
While I’ve still got to get the hardware to finish the corset (not to mention figure out where I want to place said hardware so I know how much to buy), I thought I’d put the finishing touches on the rest of Irene and make up hanging prop bags. Now it can all hang together without making a giant lump!
As you can tell, there’s one hanger for outer wear (with pockets for gloves, hat, and cummerbund) – note the new trim hand stitched at the hem, also! Trim is a big step for me, not to mention taking the time for hand sewing. And then one hanger for inner wear, with a pocket for the corset to go in once it’s finished.
Don’t you just want to wedge yourself in that chair and stay forever?!
And now we get fancy! Along with more serious work and tips: Like many of my projects, I went to the big box store with only some idea of what I was doing. We were covering a stairwell, which I don’t particularly want forming a chimney of fire, so I figured I wanted the fire resistant drywall. The guy on the sales floor made sure I didn’t buy stuff that was way too thick, and helped cut it down to the very weird measurements we needed. (And Jeff and I bribed a theatre friend with dinner to transport it all to our house in his truck.)
Jeff and I adhered the drywall many weeks later with Liquid Nails (cutting out an awkward corner where there’s brick sticking out of the floor, and squaring up the far left hand vertical). Then he informed me about the need for mud and tape. What? I just want things to look pretty! So back to the hardware store again…
And finally this fall I got out the wallpaper I’d tested at the work station only to discover pre-pasted is insufficient to secure it to the wall. Cue the recurring theme: to the hardware store! I used another internet tutorial, and let me tell you, I don’t have a work table big enough for pasting wallpaper, and that’s okay! I just laid it down on the floor…got a little paste on the carpet…bookended it, shuffled it over, finished pasting, and hung it. I think it looks pretty good for a first try. My corners could be better, and it could be less wrinkled, but it’s not completely sideways and the pattern’s lined up well.
As for the decor: the table and crystal basket are more family pieces, the globe and flower prints are thrifted, and the armchair (which someday I might try reupholstering) is from Craigslist.
Don’t look too high up – you’ll see over the curtain into the storage area!
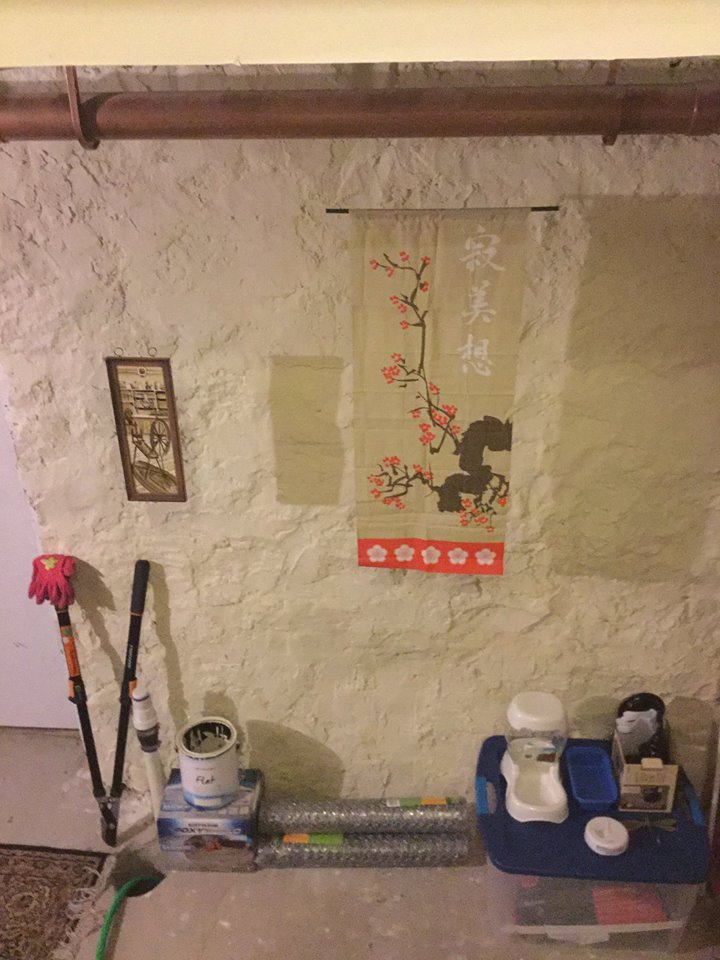
Ah, there’s that Cersei progress shot again, taken by pure serendipity. Here is where I can finally share more cleverness and methodology: I didn’t want to have to deal with the City’s permit process and inspections to add a real wall, I just wanted the appearance of one (there’s a support beam and then the furnace and water heater right behind here). So I bought some brown bedsheets at the thrift store, got a giant tension rod, and hung the sheet up as a curtain – cutting a small hole in it to hang the oriental print on a nail already in the support beam.
Fun thrifted items here include: a telescope with wooden base (I thought about painting the tube bronze, too, but couldn’t do it), a former library art piece (of the check out-able variety!), and an old timey map of the world (you know, the kind where coastlines aren’t quite right). And we got the rug on Craigslist!
Giant window ledges may also be known as cat perches…above which looms the one piece of ductwork I forgot to spray bronze with rustoleum.
Turn to your left away from the work station, and you finally get some natural light…well, during the daytime of course! There’s another window just out of frame to the right. Both are curtained with some handy dandy thrift store finds, with cozy butterfly pillows made from vintage prints and backing from the stash (and can I add that I was too lazy to hand sew them shut? I just jammed the stuffing down, tucked the flap under, and ran it through the machine one more time). Still on the list of things to do is acquiring some trim to make especially the top of the window more formal looking.
You can’t see it very well, but the brighter picture has a crowd in Victorian clothing gathered below several hot air balloons – yet another thrift store item, and perfectly suited to the steampunk theme!
Where my sewing machine should be! Some day my electricity will come…
Let’s start off with a picture again, shall we? The desk and clock were really at the heart of the whole plan – old family pieces that my dad wanted to be sure had a home, at least for a while. They didn’t really fit upstairs anymore after moving things around yet again, but I like old things, and I like crafting, and I like steampunk, so the steampunk craft area concept was born.
The shelves of the grandmother clock hold some old family glassware as well as knick-knacks I just like the look of. The lamp came as a bonus with a couple of happy lights, and I sprayed it with more bronze rustoleum to fit the theme. I also sprayed the edges of an old bulletin board (not that you can really tell, it sucks in the moisture like crazy!) and covered the board itself with a sample of the wallpaper for the stairwell to help decide on orientation. Jeff came to the rescue with fishing line to hang the board up. I have this theory that someday I’ll use it to pin up sewing pattern instructions.
The big thing still missing here is electricity. The lamp needs to plug in and so will the sewing machine when it moves down. Though I kind of hate the idea of taking up the rest of the desk space with it…
Anyway, the last thing you need to know is that the print on the desk is from a surprisingly versatile New Orleans artist. Go see it in more detail and check out their other work! (We have a print of this one, too, and don’t know where to put it…)
Your first view of the basement craft area from the bottom of the stairwell. Complete with chicken supplies.
Let’s start off with pretty pictures, shall we? Say you’re coming down the stairs into the basement, and ta da! A nicely plastered and painted fieldstone wall, with bronzed plastic pipe and some art hung up with fishing line. And yes, it’s a bit crowded with chicken coop supplies…loppers to cut raspberry cane, epoxy shield, gravity feeder, feed scoops, a stray CO detector… Moving on… How did we get here?
The fun, easy part was spray painting the pipe. Rustoleum is your friend. They make an antique bronze finish that is just lovely. Although possibly I should have dusted the tops of the pipes first…
The wall was a slog! First the research. I can’t even begin to recreate the rabbit hole of finding out that field stone basements should be coated with lime plaster and how to make it. I think the reasoning had something to do with drawing the moisture through the wall to react with the lime instead of decomposing the stones? And most of the formulas are proprietary. Looking back, though, I can crib from Wikipedia for the basics:
Lime plaster is a type of plaster composed of sand, water, and lime, usually non-hydraulic hydrated lime (also known as slaked lime, high calcium lime or air lime).
I can also tell you that I ended up working with a proportion of 3 parts sand to 1 part lime (by volume), and then adding enough water to make a nice slurry. You have to be careful both sourcing the lime (you want something like this product, not the type of lime used to fertilize lawns – it’s a different chemical compound) and mixing it (powdered lime is hazardous, so you should wear a breath mask until it has reacted with the water).
I used a big plastic tote to mix my plaster in – and with a lid, it stays usable for over a year! I started out using an extra garden stake to do the stirring which was both very silly and very hard. My uncle recommended a power driven mixer attachment, which was a godsend. You just stick it into your screw gun like any other bit, and use it like you would use an automatic mixer for batter in the kitchen.
Given my general impatience and penchant for skipping steps, it may astonish you to know that I did indeed scrape the old plaster before apply new, and waited several days for the plaster to dry before painting the wall (with one of several cans of antique white I picked up on sale years ago. Yes, there’s a hardware/home goods stash, too).
Oh, and in case you’re curious about the art: the piece on the left was a framed-tile thrift store find, and the banner (supposedly a scarf?) was a present from my dad – it commemorates the new Japanese garden at the local botanical institute/sculpture park.
Clearly woodworking did not turn out to be a topic which leads me to complex planning, introspection or eloquence. It may surface again from time to time as needed (I do foresee building an indoor [basement] fence/gate in the next year or so), but I don’t see it becoming a mainstay activity.
In other news, Jeff’s caught up again, but in terms of my wobbly-wobbly time tricks, I’m a little short on content to get you to my current costuming activities. So let’s do a little retrospective, and introduce you to the area where someday I hope to actually make said costumes: the basement steampunk craft area.
This has been a very multifaceted, long term project – and you can probably guess that it’s not done yet! There’s still the need for that last little essential: electrical power for the sewing machine…
But first, wander with me back in time (and across the internet, because I’m lazy and can’t be bothered to go photograph an unfinished wall of my basement), and you’ll see where it all started: fieldstone walls. The ones in my basement had been plastered at one point, but there were still some bare stones peeking through, and an awful lot of cracks in and chunks coming out of the plaster. The floor was bare concrete (hence the acquisition of the epoxy shield I repurposed for the chicken coop). And while the inside of the stairwell had been drywalled, the part facing the basement was naked 2x4s and plywood. Oh, yes, and the pipes and everything were exposed on the ceiling, too.
Not actually my basement! Just a fairly representative image of a field stone wall from the internet.
 For decoration/fastening, we decided on some cute little blue buttons to go on both left and right, which we’d ultimately like to connect with some brass chain. So there’s a bit yet to go on this piece, but it’s pretty close to done.